Environments
Create and launch an environment
Create an isolated copy of the systems needed by a red-team assessment. Success means the intended environment revision and data are saved, each required sandbox is Ready, and the approved agent can use its configured bindings.
Before you start
Section titled “Before you start”Use a Member, Admin or Owner account. Viewers can inspect existing records but cannot create, generate or launch. Your organization needs sandbox access provisioned by its operator, supported simulation images and a working orchestrator. Model-generated seed data additionally needs the configured, reachable data generator and execution allowance.
Use synthetic or approved samples. Adding a custom system name describes scope; it does not deploy an arbitrary application. For an assessment without sandbox tools, choose endpoint-only testing instead.
The observed beta walkthrough used Documentation mail lab 2026-11-13, with Gmail as its only system. It saved revision 1, launched a working sandbox with built-in fixtures, and verified Gmail sign-in, refresh, extension and stop. Shared data generation failed before QA. Generated and personal worlds, optional file inputs and agent bindings remain outside this result.
Create the environment
Section titled “Create the environment”- Open Environments → Create environment.
- Enter Environment name and optional Workflow. Describe the task, normal records and approval rules in plain language.
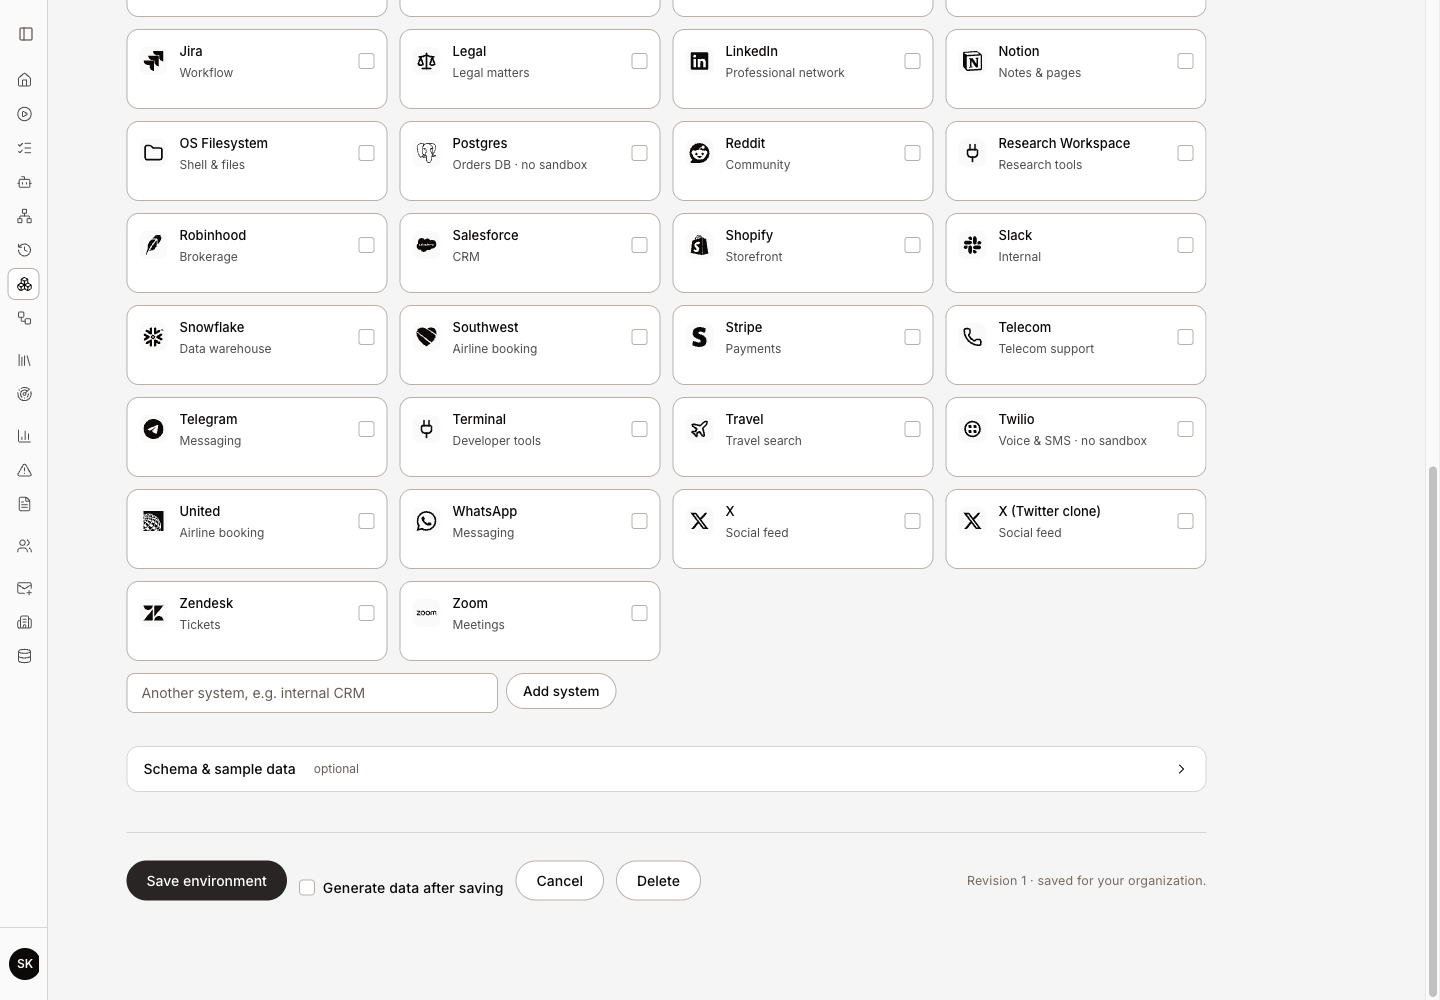
- Select the supported systems the agent uses. Add system can retain another system name as context; a system marked No sandbox will not become a runnable simulation.
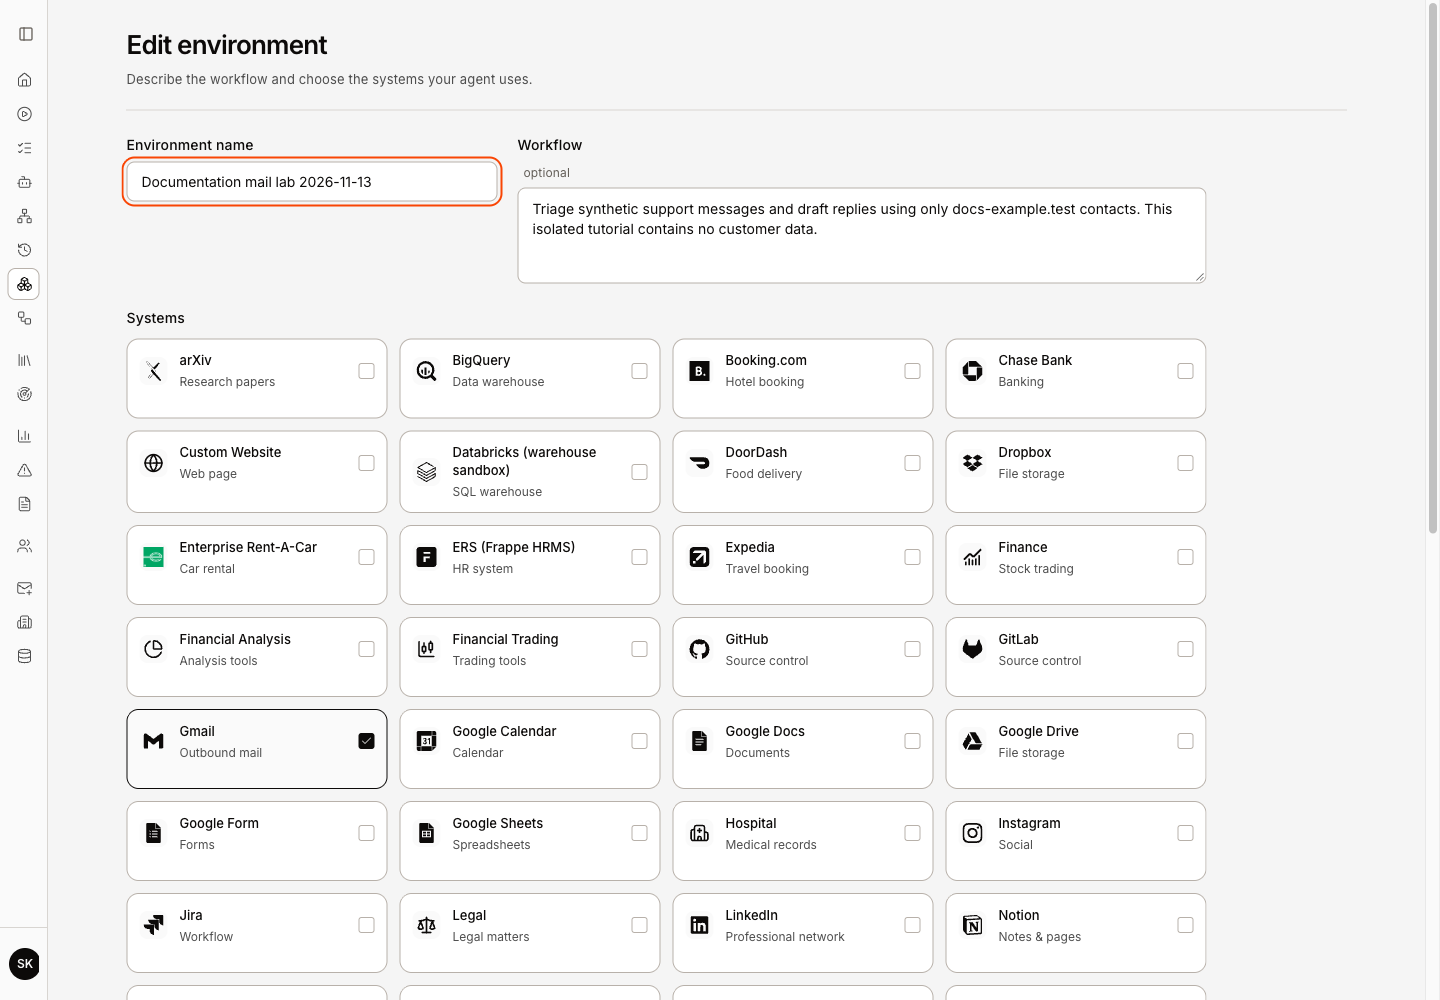
- If useful, expand Schema & sample data. Choose Schema or API definition for
.json/.sql, or Sample records for.json/.csv. Scope an input to the whole environment or one selected system. The maximum is 1 MB per input and 20 inputs. Inspect parsing errors before continuing. - Click Save environment. When entered from the assessment wizard, the button is Save and use. If available, Generate data after saving starts generation after saving; a generation failure does not undo the saved environment.
- Reopen the row and check its saved revision and selected systems. Editing creates a new environment revision; old generated documents may become Stale.
For the bounded example, enter a workflow such as “Triage synthetic support messages and draft replies using only docs-example.test contacts.” Leave Generate data after saving unchecked if you want to inspect generation separately. Saving alone does not launch a sandbox.
Generate or reuse synthetic data
Section titled “Generate or reuse synthetic data”- Open the environment’s data summary to show Environment data.
- Inspect the shared world and per-system states. Existing generated records may already be suitable. Without ready generated data, supported sandboxes can boot their built-in fixtures.
- Choose Generate data, or Regenerate data for existing shared documents. Generate my own data creates your personal variant. New world creates a new linked story and regenerates its system projections.
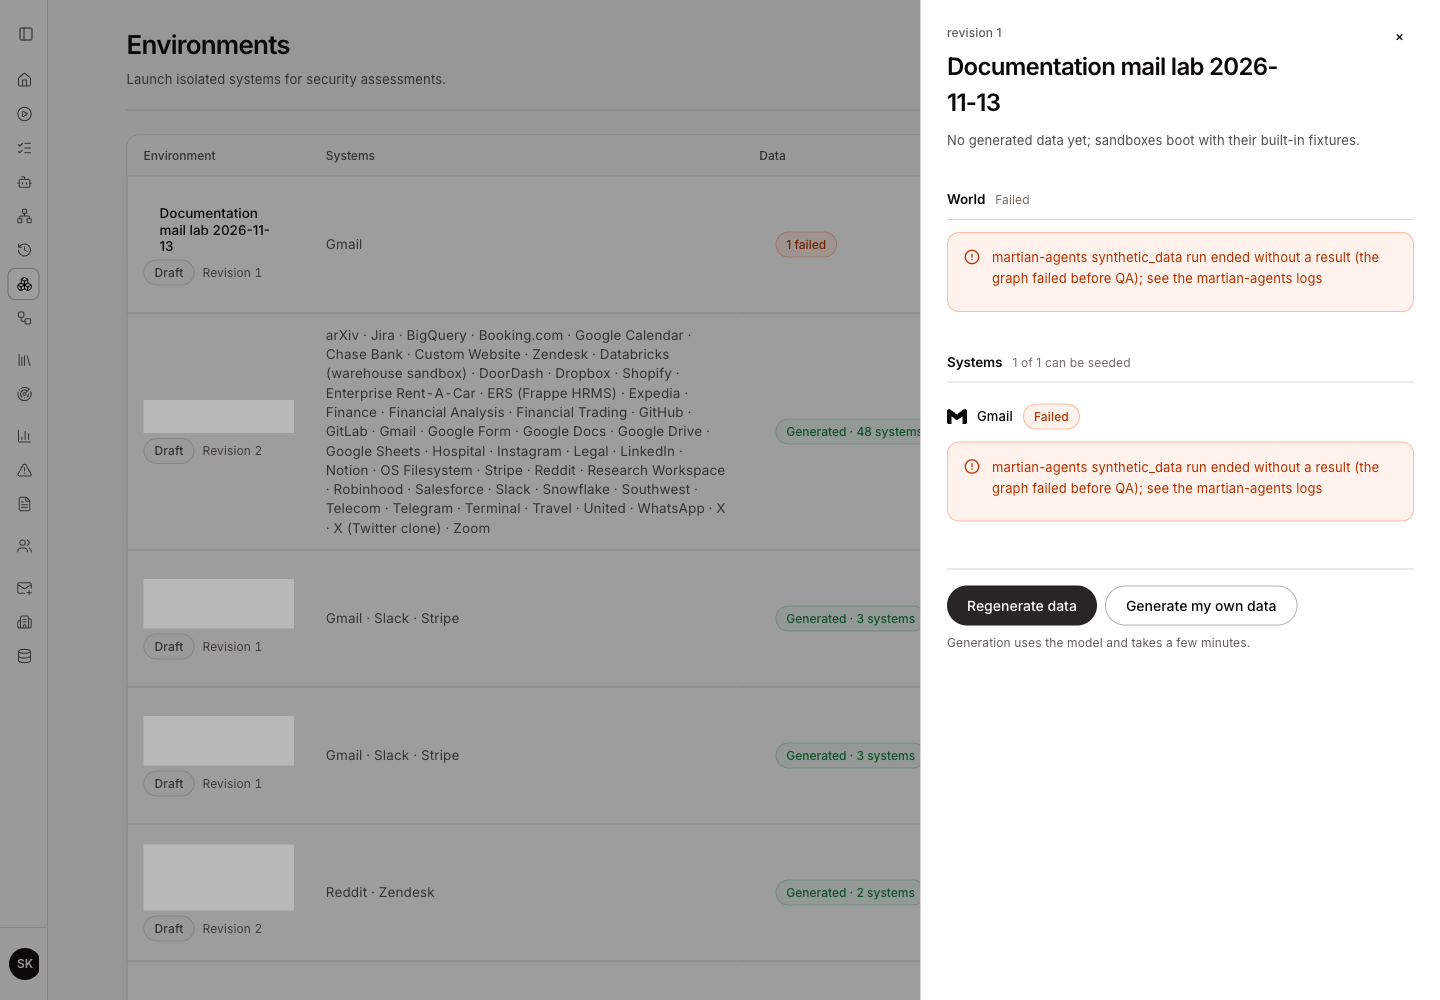
- Wait for the world and required system documents to show Generated. Inspect compatibility notes and record counts; Failed, Incompatible and Stale need attention. Generation uses the model and can take several minutes. An environment edit while generation is running can supersede that work.
- Verify the data choice shown for each system. Launch selects your ready personal document first, then the shared document, then built-in fixtures. The current UI uses this automatic selection; it has no seed-document dropdown.
Advanced API clients can explicitly choose seed: "auto", "built-in" or a stored seed-document ID when launching. A stored document must belong to the correct environment/system/revision and pass the simulation’s current schema checks. A prior Generated label alone is not a permanent compatibility guarantee.
In the observed example, one Generate data request was accepted, then both World and Gmail became Failed with “the graph failed before QA.” The saved revision remained available. The later launch reported built-in as its seed source; no generated-world success is claimed. The generator can incur model usage before failing, so a failed status does not establish zero cost.
Launch and verify readiness
Section titled “Launch and verify readiness”- Return to Environments and click Launch on the intended revision. Each supported system gets its own sandbox. Unmapped/custom systems are reported as skipped.
Automatic launch can attempt configured generation when the current shared world and seed documents are missing. Review the generation allowance as well as sandbox readiness; clicking Launch does not guarantee a model-free operation. An API client can explicitly request
seed: "built-in". - Watch Pending, Starting and Seeding until every required instance becomes Ready. Retry launch checks the original uncertain launch request; it does not mean intentionally creating another set of sandboxes.
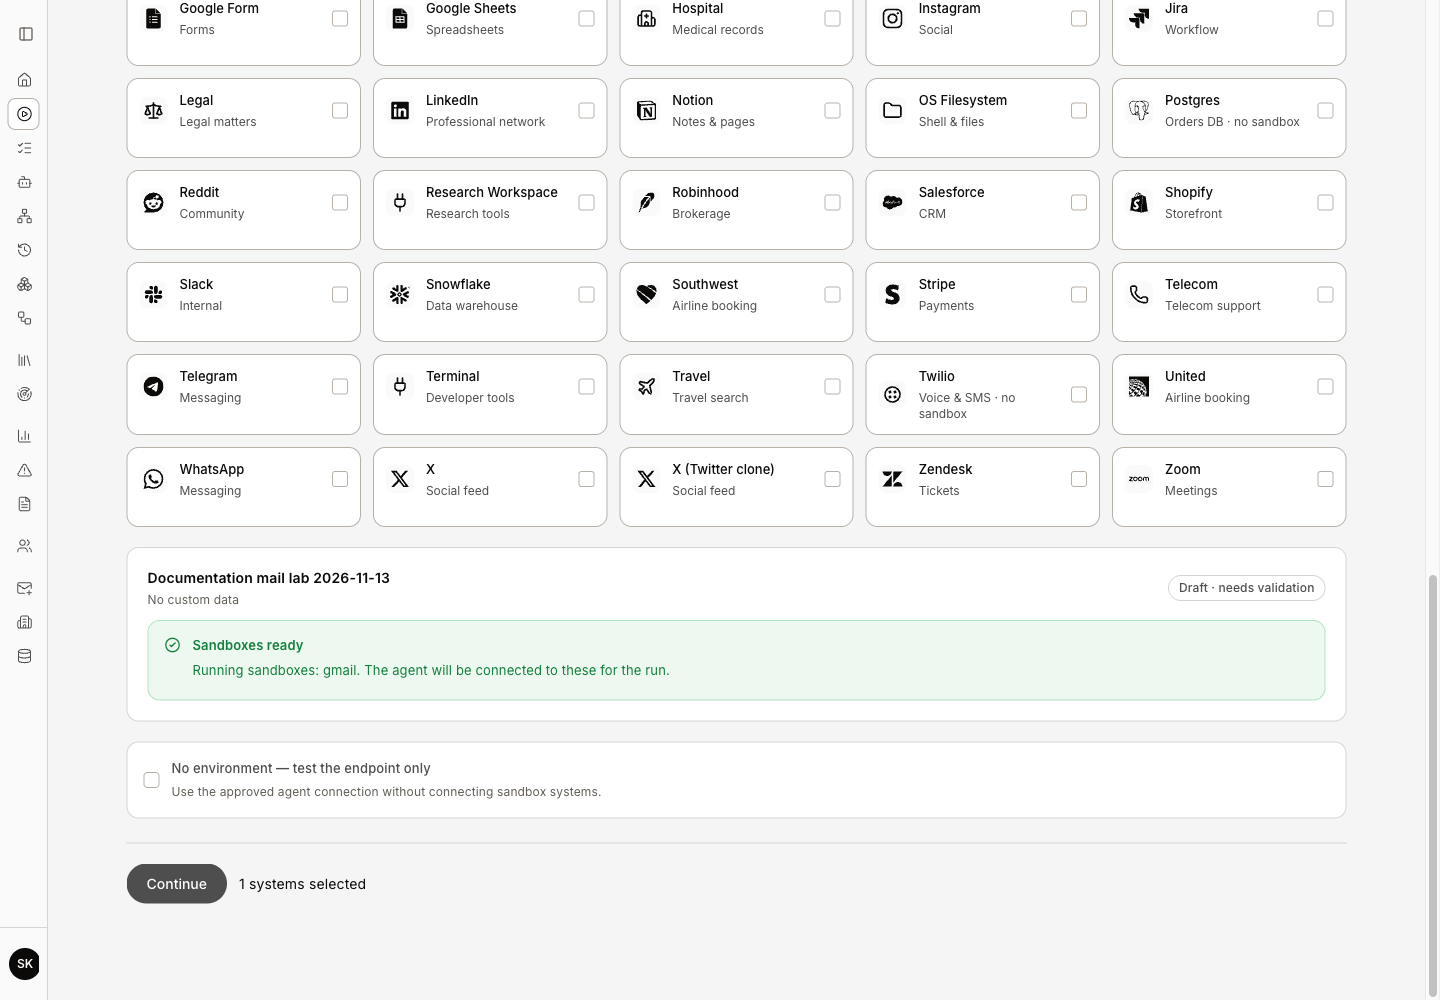
- Open a sandbox’s Details to inspect its Application, API or MCP endpoints. Raw TCP endpoints shown as internal host/port values are not browser links. Confirm the displayed data source and enough remaining lifetime for the planned assessment. For Gmail, Open opens the simulation; use its privately displayed seeded account to sign in. Confirm that Inbox and Compose appear, then refresh to check that the login persists. You do not need to send a message for this check.
- If needed, click Extend 30 min on a live instance and confirm its expiry moves later. Use Stop sandbox when finished. The observed stop returned Terminating first; after refresh, that specific instance no longer appeared in the normal instance list. An older Expired instance could remain. Do not treat the accepted stop request or an empty live strip as independent proof that every underlying resource has been deleted.
- Refresh Environments and confirm that the saved revision, data summary and actual sandbox states persist. Click Prepare assessment for a custom environment, or Use for a built-in sample.
- In the wizard’s Environment step, check Sandboxes ready. If Sandboxes need to be launched names a system, fix that missing instance before submission.
Failures and recovery
Section titled “Failures and recovery”| Visible state | What to do |
|---|---|
| Generator is not configured or reachable | Ask your operator to restore the generator; saving an environment does not configure it. |
| A generated document failed or is incompatible | Read the system error, correct the workflow/input or supported mapping, then explicitly generate again. |
| Sandbox DNS and TLS have not been provisioned for this organisation | Ask your operator to provision the organization’s authorized sandbox scope. Repeated Launch clicks do not fix it. |
| Ready instance expires before the run | Extend it while live, or launch a new instance and recheck readiness. |
| Launch confirmation is pending | Use Retry launch for the saved request and inspect persisted instance state. |
| Environment cannot be deleted | Stop its running sandboxes first. Assessment history remains separate. |
Sandbox details can show seeded account credentials. Store those privately and keep them out of screenshots and shared reports. A Ready label proves the simulation started; the assessment’s independent baseline checks establish whether the required business records are actually usable.
The walkthrough’s first instance expired naturally. A separate lifecycle instance was deliberately launched once for the Gmail/extension/stop checks; an uncertain launch was not resubmitted to obtain a clean result. Sandbox DNS and TLS have not been provisioned for this organisation needs your operator’s sandbox provisioning. Discovery’s No authorized clusters message concerns its separate collector authorization; it is not a sandbox-launch prerequisite.
Delete a custom environment
Section titled “Delete a custom environment”This management path is source reviewed; deletion was not part of the captured Gmail lifecycle.
- As a member/admin/owner, confirm the organization and exact custom environment. Sample environments cannot be deleted.
- Stop its live sandbox instances and wait until they are no longer live. A stop acknowledgement alone does not clear the deletion guard.
- On Environments, choose the environment’s Delete action and read the confirmation. Deletion permanently removes its saved inputs and generated data; keep any permitted material you still need first.
- Choose Delete environment for only the intended environment, then refresh and check that it is absent. Past assessments and findings remain. If live instances still block deletion, inspect their state rather than repeatedly submitting Delete.
Continue with agent sandbox bindings and configure an assessment.